

Kling vs Flux for Photorealistic AI Video: A Practical Guide
Oct 13, 2026
Photorealism Is No Longer a Feature, It Is the Baseline
A year ago, the exciting question about generative video was whether a model could produce anything that moved convincingly. Today that question is settled. The bar has moved to a much harder place: does the output survive being watched on a large screen by someone who did not make it? That is the real test of photorealism, and it is the test that separates two of the most discussed names in the space right now — Kling and Flux.
The two are often pitted against each other as if they were interchangeable competitors, but that framing hides the most useful insight: they are optimized for different parts of the pipeline. Kling is a video-first system built around motion, camera language, and frame-to-frame stability. Flux is an image-first architecture whose photorealistic stills are so strong that a huge number of creators use it as the keyframe engine that feeds an image-to-video step.
If you understand that division of labor, you stop asking "which one wins" and start asking "which one do I reach for on this specific shot." That question has a concrete, answerable answer, and this guide walks through it with practical detail: how the two behave on long prompts, where temporal consistency breaks down, how first-frame control changes pre-visualization, what a repeatable workflow looks like, and which mistakes quietly ruin otherwise excellent output.
How Kling and Flux Differ Under the Hood
You do not need to read research papers to use these tools well, but you do need a mental model of what each one is doing. Without it, you will keep applying the wrong technique and blaming the model.
Video-native generation
Kling was designed to output moving images. Its training and inference are built around sequences, which means it develops internal expectations about how objects behave over time: how fabric falls, how a head turns, how a camera pans and what the background should do during that pan. The practical benefit is that motion often looks physically plausible without you having to specify it. The practical cost is that precise composition is harder to force — you are steering a system that has its own ideas about where the shot should go.
Image-first pipelines extended into motion
Flux is extremely strong at producing a single, highly detailed, photorealistic frame. Its prompt comprehension for still imagery is excellent, and its rendering of skin, eyes, metals, and complex lighting is a big part of why creators adopted it so quickly. To make video, you generally pair it with an image-to-video stage, or use it to generate keyframes and reference plates that anchor a video model.
The consequence is important: Flux gives you more control over exactly what the first frame looks like, and video models give you more control over exactly how it moves. Combining them is not a workaround; it is a legitimate production strategy used by working teams.
What the difference means for your shot list
If a shot's value comes from motion — a chase, a dance, a wave crashing, a long tracking move — start with a video-native model. If a shot's value comes from a precise frame — a product hero, a character close-up, a specific composition you need to match to existing footage — start with a strong image model and then animate it. Most real projects need both.
Prompt Fidelity: Reading Long, Technical Instructions
Photorealism lives or dies on detail. A prompt that says "a woman in a cafe, cinematic" will produce something acceptable and generic. A prompt that says "a woman in her thirties at a window table, overcast daylight from the left, 35mm lens at f/2, shallow depth of field, fine skin texture, slight motion blur on the background patrons" produces something that can pass as footage.
The two systems handle that density differently. Video-native models tend to track action and camera instructions across a long prompt well, because those instructions map onto what they were trained to produce. Image-first models tend to track material, lighting, and lens instructions with more precision, because those are the dimensions that matter for a still.
A few practical rules apply to both:
- Lead with camera and light, not story. "Handheld medium shot, warm window light from camera left" gives the model a spatial anchor before it decides what to do with the subject.
- One primary action per clip. "She turns, then stands, then walks away" across a six-second clip will usually produce three half-finished actions instead of one clean one. Split it into three clips and cut them together.
- Name the lens and the format. Referencing a focal length and an aspect ratio nudges output toward real camera behavior instead of a generic rendered look.
- Describe what should not change. Explicit continuity instructions — "same jacket, same window, background unchanged" — measurably reduce drift.
- Avoid stacking contradictory aesthetics. "Documentary realism" plus "hyper-stylized neon" will average out into something that looks like neither.
Temporal Consistency and Motion Coherence
This is where photorealism is genuinely won or lost. A still can be beautiful; a five-second clip with a face that subtly reshapes itself is unusable in a professional edit.
The identity drift test
Generate a ten-second clip of a person speaking to camera. Watch their jawline, their ear, and any jewelry. Those three areas will reveal drift faster than anything else. Video-native systems generally hold identity better over a long take because they are modeling the whole sequence at once. Image-anchored pipelines hold identity best when you re-anchor every shot to the same reference still, which effectively restarts the clock on drift.
Motion physics: weight, cloth, liquids
Ask for a glass being set down on a table. The good result has a small, believable settle and a shadow that responds. The bad result has the glass sliding into the table or the liquid surface staying perfectly flat. Video-native models usually win here. Where they can still struggle is with hands interacting with small objects, and with crowds, where individual figures can merge.
Background stability
Backgrounds are the silent killer. A doorway that changes shape, a sign that re-letters itself, a window grid that gains a row — viewers may not name the problem, but they will feel that something is wrong. Locking a background plate and using it as a reference is the single most reliable fix.
First-Frame Control, Keyframes, and Cinematic Pre-Visualization
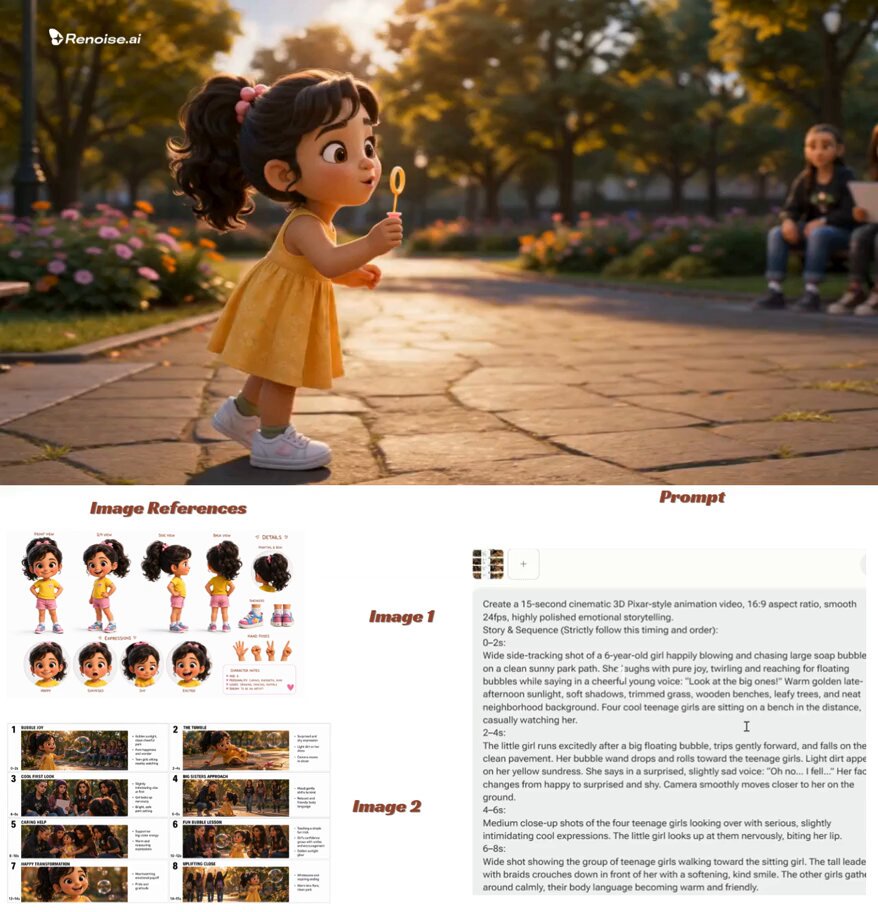
First-frame control is the feature that turned generative video from a novelty into a production tool. Instead of describing a shot and hoping, you supply the opening frame and ask the model to continue from it.
This matters for three reasons:
- Composition matching. If you need a generated shot to cut against existing footage, you can build the opening frame to match the preceding shot's framing, lighting direction, and color temperature.
- Character consistency across a sequence. One well-made reference frame, reused as the starting point of every clip in a scene, keeps a character recognizable far more reliably than repeated text descriptions.
- Client approval before generation. Reviewers can sign off on a still in seconds. Getting that approval before spending time on motion saves enormous iteration effort.
The natural workflow that emerges is what many teams now call an animatic-plus: build a storyboard of photorealistic stills, review it as a sequence with scratch audio, then animate only the shots that survived review. It mirrors how animation and VFX pipelines have always worked, and it applies whether your stills come from an image-first model or from a video model's own frame export.
A Repeatable Production Workflow
Tools change; process compounds. Here is a workflow that holds up regardless of which engine you favor on a given day.
Step 1: Lock the look with stills
Generate a small set of reference frames that define lighting, palette, lens character, and wardrobe. Ten to fifteen images is usually enough. Treat this as your lookbook and stop generating once it is approved. Endless exploration is the most common cause of blown schedules.
Step 2: Build a shot bible
For each shot, record the prompt, the reference image used, the seed if the tool exposes one, the aspect ratio, the duration, and the take you selected. This sounds bureaucratic, but when you need to regenerate a shot three weeks later — or produce a matching shot for a second deliverable — it is the difference between an hour and a day of work.
Step 3: Generate short, controlled clips
Favor four-to-six second clips over long ones. Short clips drift less, fail faster, and cut together more naturally. A sequence of six strong four-second shots will almost always beat one mediocre twenty-second shot.
Step 4: Assemble before you polish
Cut the clips together with temp music. Watch the whole sequence at low resolution. Problems that are invisible when you stare at a single clip become obvious in context, and fixing them earlier is far cheaper than fixing them after an upscale pass.
Step 5: Upscale, stabilize, and grade
Run only the surviving shots through upscaling. Apply stabilization where needed, then grade the sequence as a whole so that shots from different engines share a consistent color response. A mild film grain pass and consistent black levels do more for perceived realism than another round of generation.
Decision Criteria: Which Engine for Which Shot
Use this as a starting heuristic, then adjust based on your own test results.
| Shot type | Better starting point | Why |
|---|---|---|
| Fast action, sports, chases | Video-native | Motion physics and camera continuity are built in |
| Product hero with exact framing | Image-first, then animate | Frame precision matters more than complex motion |
| Dialogue close-up over several seconds | Video-native, re-anchored per shot | Identity holds longer within a take |
| Establishing landscape with slow drift | Either | Low motion complexity, strong results from both |
| Character recurring across many shots | Image-first reference frames | A single approved reference reduces drift |
| Stylized or surreal transitions | Video-native | More willing to invent plausible in-between motion |
A useful rule: shoot for motion with one tool, shoot for composition with the other, and keep your edit in charge of the story.
Common Mistakes That Kill Photorealism
These are the recurring failure patterns. Each one has a cheap fix.
- Overloading a single prompt. Five ideas in one clip produce five half-rendered ideas. Split them.
- Ignoring the cut. A technically perfect clip that does not match the shot before it still looks wrong. Match eyeline, lighting direction, and lens.
- Chasing max resolution too early. Generate at a workable resolution, approve the motion, then upscale the survivors.
- Reusing a prompt verbatim across shots. Changing nothing changes nothing — vary the framing and action deliberately.
- Leaving audio out of the plan. Even a scratch track changes pacing decisions, and pacing affects which shots you keep.
- Accepting the first good take. The third take is often the one with the cleanest hands and the steadiest background.
- Skipping stabilization. Tiny vertical jitter reads as amateur footage even when the content is excellent.
- Grading each clip separately. Inconsistent contrast across a sequence is more damaging than slightly soft detail.
Managing Iterations Sensibly
Generative video is iterative by nature, and iteration is where projects get expensive in time rather than money. The discipline that helps most is batching. Write ten prompts, generate ten clips, review them all at once, and only then decide what to refine. Reviewing one clip at a time encourages emotional decisions and endless micro-tweaks.
Keep a running log of what worked: which phrasing produced a stable background, which reference frame produced the best likeness, which duration reduced warping. After two projects, that log becomes your most valuable asset — more valuable than any single model, because models get replaced while your understanding of how to direct them does not.
When a shot fails repeatedly, change the approach rather than the wording. Swap the engine, shorten the duration, add a reference frame, or simplify the action. Rewriting a prompt five times is usually a sign that the shot design, not the prompt, is the problem.
Quality Checks Before You Ship
Run this checklist on the final sequence, not on individual clips:
- Watch the whole piece once at normal speed without pausing.
- Watch again at half speed, focusing on hands, faces, and background edges.
- Check skin tones on a calibrated display and on a phone.
- Confirm motion blur and shutter cadence feel consistent between shots.
- Verify that any text, signage, or logos in frame stay readable and stable.
- Confirm the cut points land on action, not a beat late.
FAQ
Is one of these models objectively better for photorealism?
No. Video-native systems tend to win on motion realism and multi-second stability, while image-first systems tend to win on frame-level detail and composition control. Most professional-looking results come from combining both rather than picking a side.
Do I need a reference image to get realistic output?
You can get good results from text alone, but a reference image dramatically improves consistency between shots. If your project has a recurring character or location, references are close to essential.
How long should each generated clip be?
Four to six seconds is the sweet spot for most work. Longer clips increase the chance of drift and make it harder to fix a single bad moment. Cut more, generate shorter.
Why do hands and small objects still fail?
They are the hardest regions to model because they involve fine geometry, occlusion, and fast relative motion. Keep hands partially out of frame, use a slightly wider shot, or choose a take with less complex interaction.
Can generated footage match live-action material?
Yes, if you plan for it. Match lens focal length, lighting direction, color temperature, and grain. Grading the sequence as a whole after assembly is what makes mixed sources feel like one film.
What is the biggest predictor of a good final result?
Shot design. Clear, simple, well-lit shots with one action each succeed across every engine. Complicated, multi-action shots fail across every engine.
The Takeaway
The realistic answer to "which one should I use" is that you should use both, deliberately. Reach for a video-native model when motion, physics, and camera continuity carry the shot. Reach for an image-first model when composition, texture, and lighting precision carry the shot, then animate it from a locked frame.
Build the workflow around stills, short clips, references, and a disciplined edit. Log what works, review in batches, and resist the urge to fix a design problem with more prompt words. The engines will keep changing; the process is what makes your output look real.

Alexander
More Blogs
Read MoreVidu Q4 Alternatives: 4K AI Video Models Compared (2026)
Vidu Q4 alternatives compared: Kling 4.0, Seedance 2.5, Wan 3.0, and Runway Gen-4 — 4K support, input modes, durations, audio, and what each costs in credits on Domer.
Top 4K AI Image Generators in 2026: 5 Models Compared on Real Costs
The top 4K AI image generators on Domer compared: Flux 3 Klein, Nano Banana 2.1, GPT Image 2.5, GPT Image 2, and Nano Banana Pro — 4K credit costs, reference limits, and speed.
Nano Banana 2.1 vs GPT Image 2.5: Which Image Model Should You Use? (2026)
Nano Banana 2.1 vs GPT Image 2.5 Flare compared: credit costs per resolution, aspect ratios, reference images, text rendering, and which tasks fit each model.