
Photorealistic AI Character Workflow: Idea to Animation
Nov 13, 2026
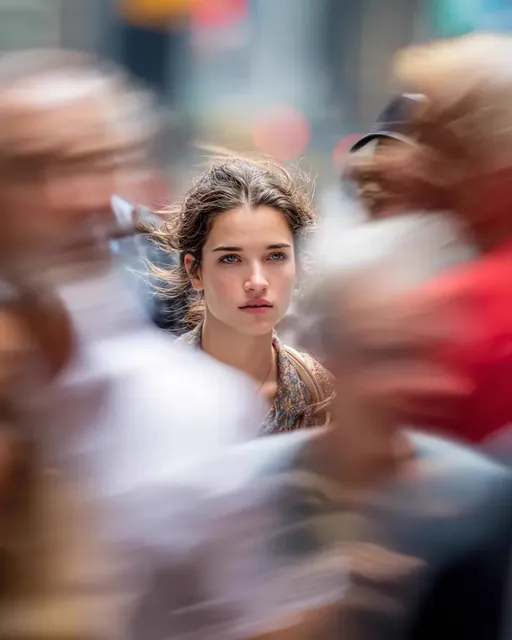
Photorealistic character animation once meant modeling, rigging, tracking, and rendering a full digital human. AI changes the economics, but not the need for direction. Strong results come from a pipeline: a clear character brief, a controlled reference pack, shot-level model choices, an animatic, identity checks, and deliberate post-production. This guide shows how to move from a rough idea to a believable performance without letting the tools dictate the story.
Build the brief before the model
Before opening a generative tool, define the finished shot. A photoreal character in a two-second social clip has different requirements from the same character in a dialogue scene or product demo. Write down aspect ratio, frame rate, target duration, shot count, dialogue needs, and the realism level the audience should accept.
Define the character contract
The character contract is the set of traits that cannot drift: face geometry, age range, skin tone and texture, eye color, hairline, hairstyle, body type, posture, wardrobe, props, and emotional range. Add motion traits. Does the character move with nervous energy, precision, exhaustion, or confidence? Photorealism depends as much on behavior as on pores.
Lock production constraints
Constraints make generation easier. Decide whether the animation needs lip sync, hand interaction, crowd coverage, or a specific camera move. For live-action compositing, note lens, height, light direction, and color temperature before generating anything. If the output is vertical, generate vertical keyframes from the start. Cropping a horizontal performance often destroys composition and makes faces look strained.
Assemble a usable reference pack
A character bible is not a mood board. It is a working document that keeps shots, prompts, and reviews aligned. Keep one page of text, one page of visual references, and a shot list. The aim is to remove ambiguity before the model invents it.
Separate identity from performance
Identity references should be clean, evenly lit, and free of dramatic expressions. Performance references show emotion, movement, and interaction. Mixing them in one folder confuses the model: it may copy a dramatic expression when you only wanted the face. Keep separate folders and combine them intentionally at shot level.
Curate instead of collecting
Start with a neutral turnaround: front, three-quarter, profile, and back. Add close-ups for eyes, mouth, ears, and hairline. Add full-body proportion, hands, and material references for fabric, leather, metal, or gear. Add two or three lighting references that match the scene. A focused set of 12 to 20 images usually beats 100 inconsistent ones.
Write the one-page brief
Use a simple structure: role in the story, age range, cultural context, face shape, skin details, hair, wardrobe materials, props, motion signature, voice reference, and forbidden traits. Forbidden traits matter because models default to glossy skin, perfect teeth, symmetry, and beauty lighting. If the character is a night-shift paramedic, specify fatigue, worn uniform, and practical light.
Route each shot to the right model
No single model is best at everything. Text-to-image models explore and draft keyframes. Reference-conditioned image models refine identity. Image-to-video models add motion. Video-to-video models transfer performance or style. Upscalers and compositors finish the frame. The art is knowing when to stop iterating in one tool and move forward.
| Shot need | Best input | What to evaluate | Fallback |
|---|---|---|---|
| Concept exploration | Text brief | Silhouette, mood, wardrobe logic | Quick sketches |
| Identity lock | Multiple still references | Face consistency, skin texture, age | Manual retouch |
| Keyframe approval | Approved still plus camera notes | Composition, lens, lighting | 3D blockout |
| Body motion | Keyframe or short video | Weight, balance, ground contact | Motion capture |
| Facial performance | Close-up still plus audio or video | Eye direction, mouth shapes, micro-expression | Face replacement |
| Final upscale | Approved video take | Detail retention, flicker, artifacts | Frame restoration |
Use the matrix as a decision aid, not a law. If a model gives the right performance but the wrong face, fix the face in post or regenerate with stronger identity conditioning. If it gives the right face but weak motion, use the still as a keyframe and animate elsewhere.
Test before production
Run small tests before committing to a scene. Generate the character in three lighting conditions, two camera angles, and one action pose. Compare identity drift, material consistency, and motion artifacts. A prompt that works in a beauty shot may fail in rain. A model that handles skin well may struggle with wet hair or reflective gear. Find those limits early, when changes are cheap.
Design keyframes and an animatic
Keyframes bridge still design and motion. They define composition, pose, expression, and lighting before video adds timing. A strong keyframe looks like a frame from the finished film, not a character sheet. Use the lens language you plan for motion. If the final shot is a 50mm medium close-up with window light, build it that way.
Block the shot first
Even a rough animatic saves time. Sketch with simple shapes, use a 3D mannequin, or edit stills into a timed sequence. The animatic answers what prompts cannot: where the cut lands, how long a look holds, when the camera moves, and whether the action reads at a glance. If the shot fails with crude shapes, photoreal detail will not rescue it.
Write prompts in layers
A useful prompt has layers: subject, identity anchor, action, camera, lens, lighting, environment, material behavior, and constraints. Build the image the way a cinematographer would. For example: a field biologist in her late thirties, weathered skin, dark curly hair tied back, faded olive field jacket, crouching beside a stream, medium close-up, 50mm lens, overcast morning light, wet fabric, shallow depth of field, natural color, no beauty retouching, no exaggerated expression.
That prompt is specific without becoming a novel. When something fails, change one layer at a time. If the face is wrong, adjust identity references. If the pose is wrong, change the action or use a pose reference. If the light is wrong, fix the lighting layer before adding adjectives.
Animate with controlled motion
Image-to-video is the default starting point for photoreal character work because it preserves the approved keyframe. The model interprets motion from the prompt, starting image, and any controls you provide. Keep first takes short. A three-second take with clear action is easier to judge than ten seconds with several beats.
Use performance transfer for precision
When a character needs a specific expression or body rhythm, use a performance reference. A smartphone take of a performer reading the line can provide useful timing and micro-expression data. Keep it clean: one performer, stable framing, even light, and no distracting background. Borrow timing and physical logic, not identity.
Iterate in short takes
Generate several takes with small variations: a slower head turn, a firmer stance, a slight camera push. Review side by side. Choose the best performance, not the cleanest frame. Cleanliness can be fixed later. A lifeless take cannot. Once a strong take exists, extend it or build coverage around it.
Watch physics and faces
Common failures include sliding feet, rubbery elbows, changing hands, unfocused eyes, and hair that moves like smoke. Some fixes are prompt-level: ground contact, weight shift, loose fabric, individual strands. Some are workflow-level: shorten the shot, reduce complex hand interaction, or use a 3D pass for difficult contact. Do not ask a video model to solve a stunt that needs choreography.
Keep identity stable across shots
Consistency is a pipeline problem, not a prompt. The audience notices when the jawline changes, skin tone shifts, or eyes move closer together. Build identity checks into keyframe approval, motion tests, first assembly, and final grade.
Keep a look-up table
Record the approved face reference, wardrobe reference, lighting reference, and prompt fragments that worked. Note the model, settings, seed if available, and negative constraints. Start each new shot from the approved reference, not from memory. Update the table only when a change is intentional.
Limit reference drift
Reference drift happens when each generation is based on the previous generation rather than the original. Return to the clean identity reference for every new shot. For long projects, consider a small character adapter or a consistent 3D base for hard angles. The goal is a stable anchor, not a pile of near-duplicates.
Review at full size
Review identity at 100 percent zoom, not in a playback window. Check eyes, teeth, ears, hairline, hands, and clothing seams. Compare the shot to the bible side by side. If the performance is strong but identity is slightly off, decide whether post can fix it. A small eye correction is cheaper than a full regeneration. A changed face shape is not.
Polish in post-production
Post-production is where AI footage becomes a finished scene. Stabilize, composite, clean, grade, and mix. AI frames often need targeted repairs rather than broad filters.
Repair the frame
Track the shot and remove drift before adding elements. If the character interacts with a prop or live-action plate, use masks and contact shadows to sell the connection. Retouch skin selectively: keep pores and fine lines where they support realism, but reduce plastic smoothing. Sharpen the eyes, correct catchlights, and check eye direction. Clean hair edges and stray strands around the face.
Sound and delivery
Sound sells performance. Add room tone, cloth movement, footsteps, and breathing before judging the picture. For dialogue, check plosives, jaw movement, and tongue visibility. If lip sync is weak, consider a close-up cutaway, an over-the-shoulder angle, or a reaction shot. Export a clean master, then make platform versions from it. Check compression on faces and dark areas, and compose vertical versions rather than cropping.
A compact teaser workflow
Start with a one-page brief and a six-shot animatic: establishing shot, introduction, action beat, close-up, reaction, and title card. First build and approve the identity. Then create six keyframes that match the animatic. Animate the hardest shots first, usually the close-up and action beat, because they reveal whether the character can carry the scene. Generate remaining coverage with the same references and lighting notes. Finally stabilize, clean face and hands, add sound, grade, and cut platform versions.
The teaser should not use every idea. Pick one action, one emotional beat, and one memorable detail. A character who looks real but does nothing interesting is still a demo. A character who makes a small, specific choice can feel alive.
Common mistakes and fixes
| Mistake | Symptom | Fix |
|---|---|---|
| Too many references | The face changes between generations | Curate 12 to 20 consistent images |
| Mixing identity and performance | Expressions override the face design | Separate folders and combine at shot level |
| Overwriting prompts | The model ignores key details | Use layers and change one variable |
| Skipping the animatic | The scene has no rhythm | Block the edit before motion |
| Ignoring aspect ratio | Faces look stretched | Generate in the delivery ratio |
| Trusting one long take | Motion drifts and artifacts build | Generate short takes and assemble |
| Fixing everything in post | The performance feels plastic | Solve motion and identity at source |
FAQ
Can AI create a truly photorealistic character?
It can create frames and short performances that read as photorealistic in context, especially when identity, lighting, and motion are controlled. The limit is usually not skin texture but performance logic. A character becomes convincing when the eyes focus, the body carries weight, and the action fits the scene.
How many reference images do I need?
For most projects, 12 to 20 well-chosen images are enough: a turnaround, close-ups, a full body, hands, wardrobe details, and two or three lighting references. More images help only if they are consistent. A large folder of conflicting faces will make the character less stable.
Do I need 3D software?
Not always. Many shots can be completed with stills, video models, and post-production. 3D becomes useful for difficult angles, repeated actions, complex hand contact, or scenes that need precise camera movement. A simple mannequin or blockout can also improve the animatic without becoming a full 3D pipeline.
How do I avoid the uncanny valley?
Reduce perfection. Add skin texture, slight asymmetry, natural posture, and small imperfections in wardrobe. Give the character a clear thought or objective. Avoid long, static close-ups of a face doing nothing. Cut away, add reaction shots, and use sound to support the performance.
Can this workflow handle stylized characters?
Yes. The same pipeline works for stylized realism, animation, and hybrid looks. Change the reference pack and realism constraints, but keep the character bible, animatic, model routing, and review loop. Consistency matters more than photorealism.
What should I test first?
Test the hardest shot: usually a close-up with dialogue or a full-body action with hand contact. If the character survives that shot, the rest of the sequence is easier to plan. If it fails, adjust the design or the shot before building more coverage.

Alexander
More Blogs
Read MoreHow to Get YouTube Transcripts Reliably After Platform Changes
Learn reliable ways to retrieve or regenerate YouTube transcripts after platform restrictions, with ASR workflows, quality checks, and SEO uses.
After Effects Speed Changes in a Premiere Pro Workflow
Learn how to sync speed changes between Premiere Pro and After Effects, avoid timing drift, manage Dynamic Link, and build a reliable retiming workflow.
A Practical Guide to Optimizing 360 Video Workflows
Build a faster 360 video workflow in After Effects with projection setup, seam fixes, AI asset integration, motion matching, caching, and delivery checks.